Friday, April 20, 2007

Worm Bin Pictures


There are many different ways to build your own worm bin. The final decision will depend on your own preferences, life -style and capabilities.

Here you see a bin split in the middle with an oven rack, a black pipe with holes drilled in it for air and the bottom has no drainage holes.

This person appears to be single, living in an apartment.

Click Here to go see the whole project. The wormer does a very good job of explaining his bin, feeding cycle and harvest methods. He experimented with different solutions to his particular problems until he came up with a satisfactory method to compost with worms in his customized situation.

This wormer mentions using shredded paper and corrugated cardboard for bedding. In his situation the cardboard persisted longer than the paper. He mentions being surprised at this as information indicated that worms love cardboard. This is just proof that there is no absolute right or wrong way to worm bin compost. No food/bedding stock that is the only food/bedding stock to use. Each wormer has to work with what they have available and find out what is going to work for them. Let the worms be the judge. I always say, I don't care how you do it, if the worms are happy, it's right.

Wormnwomn,
Mother Earth's Farm / VermiCulture Northwest

Friday, April 13, 2007

Build Your Own Worm Bin

I've seen where a lot of people are looking for how to build a worm bin.

I thought perhaps I could help by providing some pictures of a bin I built in a week-end.

I have the plan available and you can request a free copy by clicking the link in the right sidebar.

It's easy to build a worm bin out of a plastic tote. Choose your size and color, drill your holes and you have a worm bin.

But maybe you want your bin to be a little more earthy. Or maybe a little bigger.

Your typical tote (especially if you buy one already made into a bin) will be big enough for 1 or 2 people. To handle the waste of a family you will need a bigger bin.

A 1x2x3 bin is perfect for a larger family. And it is made of wood so it has a more earthy feeling.

Here are pictures of a 1x2x3 bin that I built in a weekend with no special tools.


If you know anyone who is handy with a saw, you could probably build your bin from these pictures.


This bin is easy to build.

It is a great size for family of four to six.


A 1x2x3 bin can be built from one sheet of plywood and 2 x 4 wood stock.

It can actually be any size you want.


So build yourself a bin, take my free e-course so you know what you're doing and order some worms .

Happy and Successful Worming,

Christy
Mother Earth's Farm / VermiCulture Northwest

Wednesday, April 11, 2007

All Worms Are Not Created Equal

I've heard it many times before. People want to buy worms to put in their gardens. But it doesn't work that way.


There are soil dwellers and there are composting worms. They are not the same.


I just had a customer the other day order a pound of worms. Once she got them she emailed me and indicated she had put them in the soil. I wrote her back and said, "Please tell me you did your homework and that you did not put your composting worms in the soil." Her response was, "I did not do my homework and put them in the dirt....Next time I will read the web site."


Soil dwellers are burrowers. They burrow a deep hole in the soil and attach themselves then stretch out to the surface to search for organic matter dragging a piece down into the burrow to eat. Soil dwellers spend more time burrowing than eating.


Hint: the eating is what produces the castings.


The composters are consumers. They continually move through organic matter eating as they go. That's what they do, day in and day out. Eat, mate, and make babies. Thusly, they need to be in organic matter, aka: leaf pile, manure pile, compost pile...


Please don't put your composters in the soil. They will starve or they will go looking for food. They will not help your soil by being in it.

In this picture you can see the layers in the compost bin. The top layer is composting leaves and shredded newspaper. The worms are concentrated in this top layer. The lower layer is the finished material the worms have already worked. This material is 50/50 worm castings and "compost". If there was not fresh material on top for the worms to eat they could go back and eat the "compost" and even their castings again and derive more nutrition from it. The can not, will not eat soil.


Happy, successful worming,

Wormnwomn
MotherEarth'sFarm

A site I found to share: http://www.echocurio.com/Exhibit-WormsSaveThePlanet.html

Saturday, March 24, 2007

As The Worm Bin Turns

I have visited many forums talking about worm bin composting and I constantly see the question being asked, “Do I need to turn my worm bin?” Most of the time the advice I see given is, “No, the worms do the turning…”

I have to set the record straight here. In my 9+ years of worm bin composting my bins have been through every experience from the best to the worst. My worms tell me that even though they don’t like being disturbed; they much prefer an environment that is loose and well aerated to that which is compact and dense.

Yes, I will agree that the worms do move through the bedding stirring it up, but you have to realize they are taking a very coarse material and breaking it down into a much finer material. In doing so the material is going to settle and become compacted. The worms are going to benefit greatly by being turned and loosened, incorporating air into the mix. Believe me the worms are happier. Add your fresh bedding and food stock at this time and the worms are going to reward you by actively moving into your fresh offering and getting right to work.

I supplement my feed with Purina Earthworm Chow. The directions on this professional product read as follows: “For best results, stir or turn the bedding at least twice a week. Keep the bedding loose and well aerated.”

Now I don’t turn my worms that often. My personal goal is to turn each worm bin at least once a month. Sometimes, especially during the winter months it just doesn’t happen. But during the worms’ active months I try harder. I know they are happier and more productive, which makes me be more productive.


My worms tell me they are happy. And now I need to get out and turn a worm bin.


This is the tool I use to turn my worm bins.

Happy Worming,

Christy
Mother Earths Farm
VermiCulture Northwest

Tuesday, March 13, 2007

Be Creative With Your Unique Situation

I have always said that there are as many ways to worm bin compost as there are people worm bin composting. Always let your worms have the final say. If they are happy they will let you know. But you really need to pay close attention, because if they aren't happy bad things can happen fast.

Some day I hope to have the means to put together my own video showing how I worm bin compost. But until that day comes, I am on the look out for what other people are doing. Well, I found this video I thought I'd share with you. I think I'll try it out for myself. The information is basic and doesn't get into the details of the day to day. But check out my e-course and you'll get what you need.


METRO-WORM-CONDO
A short how to do it yourself video about worm composting in an urban environment.
This video explains & shows how to build your own worm composting bin system.

Happy worming,

Christy

Wednesday, March 07, 2007

Learn to Worm

Bin Compost...


Are you looking to start a worm bin? If so you are probably looking for information to help you get started. If that is the case, then listen up.


I have finished the second writing of my book "WORM BIN COMPOSTING: Nature's Way of Replenishing the Earth."


A good book is never really done. Such if the case with "WORM BIN COMPOSTING..." I will continue to add information as I rework the book, and new information as I discover it will also be added. Of course, the price will go up as I spend more time and resources gathering information to add to this already valuable resource..


The book covers all the "how to" information you will need to start your own worm bin. Plus it discusses all the other critters you will find in a healthy bin.

Like this one:


If you would be interested in purchasing this e-book you can

click here now.


If you do decide to purchase through this link I will gladly provide you with free updates of this book as I add to it. If you are interested in this additional benefit then you will need to sign up to my Worm Mailing List.

You can do that by clicking here.

I will also send you a free gift - plans for building your own 123 Bin, which is a great size for any serious worm bin composter to begin with.

PLEASE NOTE! If you would like to receive the 123 Bin plans you will need to send me your mailing address in a separate email to:

info@motherearthsfarm.com

Please put "123 Bin plans" in the subject line.


I have personally been busy getting my worm bins ready for the already warming Spring weather. Bins are getting turned and new bedding material is being added. This is the time of year when you can really mix it up and add good amounts of food waste which will rapidly be consumed by worms and bacteria which are becoming active with the warmer temps.

Finished material is being removed to be processed which leaves more room in the bins for the additions mentioned above.

We are coming into a busy time of year... Keep a cool head and enjoy the rebirth of Spring.

Wormingly,

Christy
Mother Earth's Farm / VermiCulture Northwest


Monday, February 05, 2007

Are Worms Vegetarians?


Worms will eat your garbage -

They will eat your manures (stay away from domesticated animal manures like dog and cat), they will eat shredded paper (none of the slick stuff), they will eat your leaves and grass, they will eat your cardboard, they will eat your saw dust (wood shavings), and they will eat your food waste. In particular they love - coffee grounds, cardboard, melon rinds, and all sorts of "sh_t."

Manures mixed with wood shavings is a great combination. Melon rinds are great if you have a mite infestation.

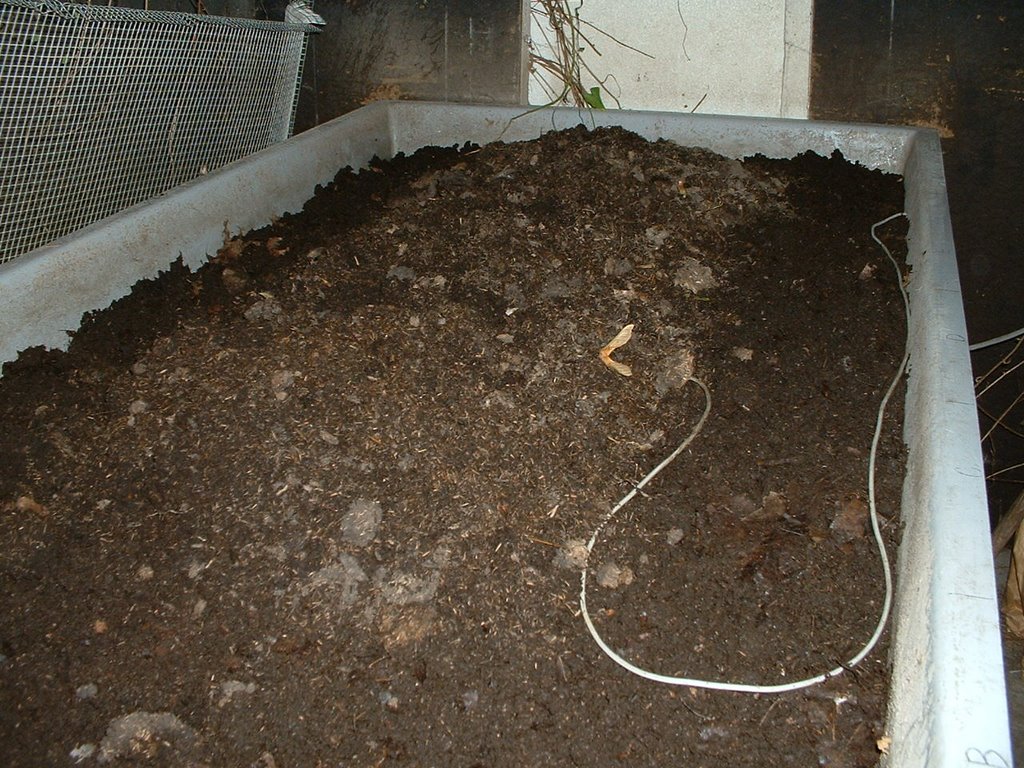
Shredded paper and leaves are a great layer to add after you layer on food waste. I really mix these things up in the winter to get some good composting action going for the colder temps. In the heat of summer you need to keep things simple to produce as little heat as possible.

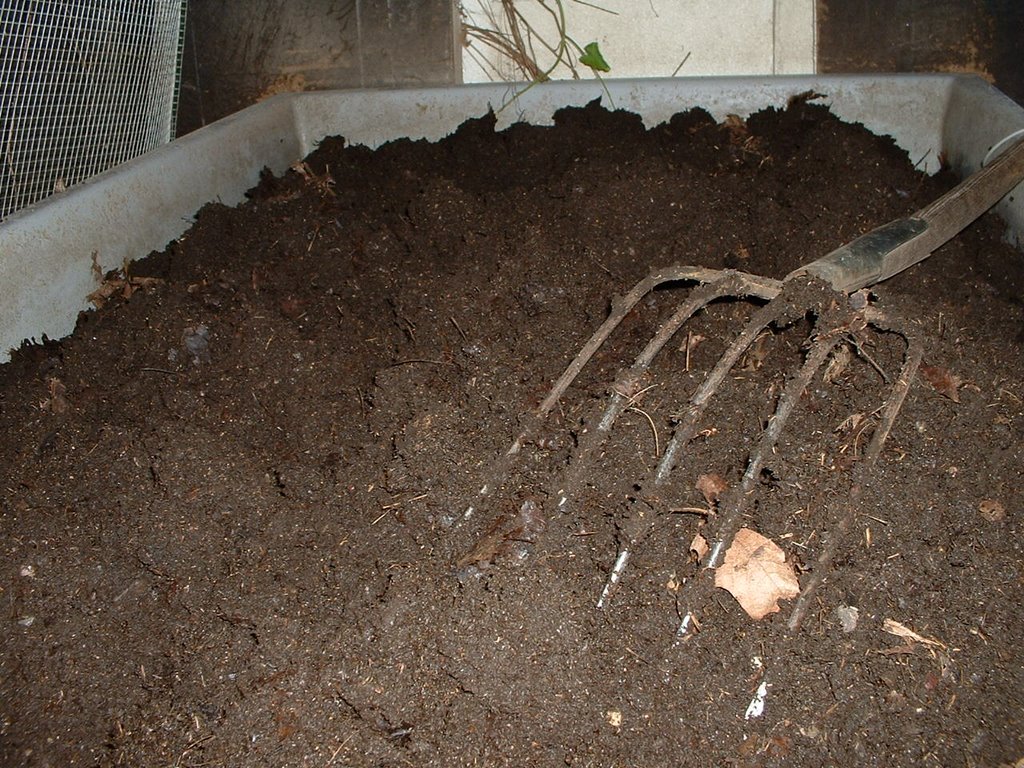
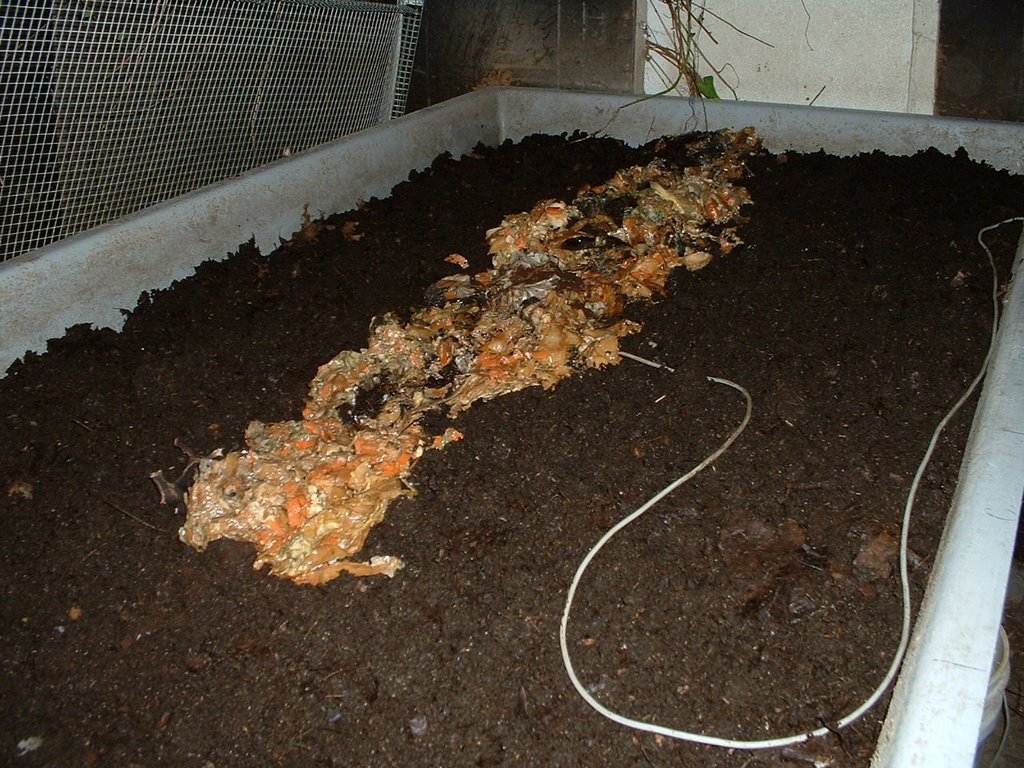
Use some kind of processor for your food waste to get the pieces small. I use a butcher knife or a food processor on pulse. My neighbor saves me all his waste from his kitchen in a bucket. I don't process any of that, I just dump it into my worm bin. But when I go to the grocer and get food waste from the produce department then I process that because it is all still whole. The processing is just so the composting process will move along faster.

It's not so much that worms are vegetarians, because really they aren't. They will eat anything that has lived and died.

However, there are a lot of other critters that are attracted to meat, and fat, and bones. And, since the decomposition rate of these are much slower, they are not a desirable addition to your worm bin, or any compost bin.

Therefore, you do not want to add, meat or bones to your compost system.

Dairy products? I wouldn't dump a load of cheese or dump old salad dressing into the system. But if you have a dinner plate that has uneaten salad with dressing and some grated cheese on it, go ahead and dump it in the compost bucket. Your system will handle it just fine. Bury it and cover it with a good layer of bedding and let the composting begin. There isn't much of anything that your system can not handle in moderation.

Citrus peels are something I am very careful about. While I don't worry about the peel from an orange or two, if someone had decided to juice a bag of oranges for orange juice I would not put all of those peels in my worm bin. There is a substance in citrus peels that the worms don't seem like too much.

Likewise, with oak leaves or pine needles. While I would not worry about a small amount of these in my worm bin, I would not dump a load of either of these items in my bin as well. The outer coating on oak leaves and pine needles is very slow to decompose. And yet in nature these things do decompose quite nicely in time. The tanin is a substance the worms don't seem to like either.

Another thing I watch for is making sure that any manure I use has composted at least 6 months. There are some exceptions. Rabbit manure, because it is not a "hot" manure, can be used immediately. As a matter of fact rabbits and worms are a great combination. But that's for another post.

Here in my neck of the woods we are soon going to be rolling into the time of year when the worms are going to be getting active again and the feeding will begin in earnest.

Happy worming,

Christy
MotherEarth'sFarm

Sunday, January 28, 2007

If You're Worm Composting for Your Gardening Efforts...

If you're worm composting for the purpose of having a better garden this year, then let me remind you, that is only part of the picture.

Castings are definitely the very best when it comes to soil ammendment, but it is not all you have to figure into the equation.

Starting early when you live up North is sometimes the only answer to getting a good harvest. And I would imagine that where it gets hot, it would be beneficial to start early as well.

No doubt about it, where-ever you live, you're going to get a more bountiful harvest if you get a jump on the gardening season. Even if you already get a good harvest from a product maybe you could get enough of a season to actually be able to plant a second crop, or even a third.

If you are planning your garden space well, feeding your soil and keeping it healthy there is much more you can get out of a square foot of space.

When you work so hard all season weeding, watering, feeding and staying on the look out for pests and disease, how disheartening is it for you to only get a handful of produce for your efforts?

Put a little more effort into getting an early start and your efforts will be rewarded many times over.

MML Brand


The gardening season is just around the corner and the best way to get a
jump on the season

is to start indoors. Get those seeds started while Ol' Man Winter
is still raging and you'll be

way ahead of the pack.

Use castings in your seed starting mix and you'll have what seems like a miracle right before your eyes.

Gardener's Supply Company - Free Shipping on orders of $55 or more >>

Rev your engines for a speedy start on the gardening season.

You can get some of your best Organic supplies right here!


For all the extras that you won't find on my site, I love to shop at Gardener's Supply. And with free shipping on orders of $55 or more, you just can't beat that.

My newsletter, Market Monthly News is just about ready to start this years publication. I will be sharing with you, step by step what I do to get an early start and achieve success in my garden. Go here to subscribe.

The catalogs are coming in. If they aren't coming for you please send me a message via my form here on this blog and I will share resources with you to help you get some of the best catalogs available for organic sources for seeds and supplies.

May the sun shine bright on your gardens,

Christy
MotherEarth'sFarm.com


Wednesday, January 17, 2007

I'm starting a new Worm Bin Composting blog.


I happened across a forum called GardenStew.com. There seems to be alot of really great people there, the lay-out is easy to follow and interesting. Not the ordinary, run-of-the-mill forum.
And they also have the option of starting a blog, which is also easy to set up. They didn't seem to have anyone really talking about worm bin composting so I started a new topic on it and set myself up a blog as well.


I would like to invite you over to check it out.


I will not be abandoning this blog. The two are completely different. There is much more interaction over at GardenStew so I will take the lead of all the people who ask questions and have things to say.


This blog will remain a step-by-step process of what's happening with my worm bins.


I will be posting an up-date soon as the weather has been very frigid here. I want to share with you how the bins have been doing.


The last time I was out tending the worms it was a mild day just before the frigid temperatures hit. It was the perfect time to get out there and turn the bins, working some of the fresh material down into the composting material to try and generate some heat. It worked...I had turned all the bins down to 50, the temperature plummeted to the single digits, and the bins were reading 64 degrees, so composting definitely going on in the bins. The worms should be happy. Won't know how happy until the temps get back up to where I feel like being out there for an extended amount of time.
Later,
Christy
Where good things come from for the body and soil.


Monday, December 18, 2006

Out in the cold! - Update on the bins...


This picture, taken the beginning of November, is the fresh pile of leaves (mostly maple) my neighbor has left for me after fall clean-up in his yard. The pile is probably about 4 feet high and about 6 feet by 10 feet for the biggest part. This is an on-going leaf pile I use for the worm bin. Even in the dead of winter I can dig into the middle of this pile and find workable material to put on my bins which not only provide a layer of breathable material, but act as a blanket on the worm bins holding in heat.

The handful of bedding to the right was the consistency of the lower layers in the bin at this same time, the beginning of November. It is important that while the weather is still mild, that the bins are turned to get air down into the bedding. Too much moisture and not enough air causes the environment to go anaerobic. This you can tell by the smell of the bedding. It will start to "stink."

Right now the outside temperature is freezing. Our high today was in the mid 30's and our low was in the low 20's. The leaf pile was frozen on the outer layer, but once I broke through that layer I was able to gather soft wet leaves from inside the pile for the worm bins. The worm bins were reading 56 degrees, with one of them reading 61 degrees. This was the bin I worked last time and added some food waste to, covering with a layer of leaves.

I have one bin which has no heat source. It has been without a heat source since the fall of 2005. So this is the second winter without heat. This has been my best performing bin.

The top layer is frosty looking, but when I inserted a compost thermometer it slid into the bedding material easily, indicating the bedding was not frozen. However, it was reading in the 30's. I did not disturb this bin at all. In the spring I will show you pictures of the worms in this bin. They have consistently out-sized the worms in my other three bins which have a heat source.

I don't work the worms as much during the winter for obvious reasons, it's cold outside... So I try to keep the beds cooler so the worms require less - less food, less water.

Hope your happy worming wherever you are.

Christy
www.vermiculturenorthwest.com

Sunday, December 17, 2006

AACT - What's that?

AACT is the acronym for Actively Aerated Compost Tea. I have recently been dealing with a customer in Hong Kong who is an orchid hobbiest and he has been interested in using my vermicastings in brewing tea, so I have been busy gathering information for him. I will share what information I find here on my blog and on my website - VermiCulture Northwest.

What I have been reading lately has to do with chlorinated water. Chlorine in your water will have an effect on the bacteria in your tea. This issue can be solved in a number of ways.
  1. You can simply choose to let your water sit for 12-24 hours.
  2. You can aerate your water for a couple of hours.
  3. As pointed out by Dr. Ingham, if you add humic acid to your tea, it will change chlorine to chloride, and not effect your tea.

That's it for now. More later on AACT.

Happy worming,

Christy

Saturday, December 09, 2006

Nothing Short of Magic

We know more about the movement of celestial bodies than about the soil underfoot.
- Leonardo da Vinci, circa 1500s

Nothing short of magic is how I see the wonders of what my little workers will do with the likes of manure, leaves, shredded newspaper, and what we call garbage.

But, of course there is more than magic to it, actually it is science. And in reality it is more than one science - microbiology, ecology, soil science and agronomy.

Recently, soil ecology has developed to the where the lid on the black box of underground processes can be opened and we can try to comprehend the intricate equation that the symbiotic relationships between plants and micro-organisms creates.

Dr. Elaine Ingham is widely accepted as an expert in soil biology. Ingham's message has been summed up by one author in this way:


  • "Life on earth is sustained by a complex underground ecological system - the soil food web."
  • "Through ignorance, we've disrupted the food web, in particular with ill-advised farming and gardening methods."
  • "We can return the food web to health by restoring the soil biology." - Bart Anderson

______Here's a view of the soil the way Dr. Ingham sees it______

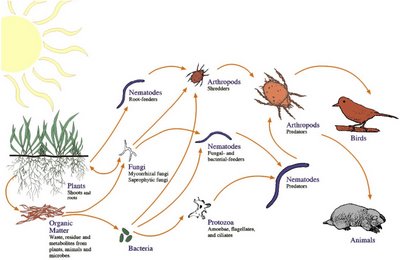
The Soil Food Web: Eat and be eaten.
__________________________________________________

The following information is taken from an excellent article at:
http://www.energybulletin.net/23428.html

Soil food web in brief:

  • Soil food web - basis for life on the land.
    ~Breaks down dead plants and animals and recycles nutrients.
    ~Numbers and varieties of organisms are staggering.
    ~Reproduction rates are high (especially bacteria), and populations tend to boom and bust with different levels of oxygen, nutrients, heat, pH and water.
    ~Complex ecological relationships.
  • Soil food web is composed of several classes of organisms.
    ~Plants - roots and organic matter from plants.
    ~Bacteria and fungi - many varieties and functions. Most are decomposers, while many others are mutualists.
    ~Other members of the food web - protozoa, nematodes, arthropods, earthworms and higher predators.
    ~Predators eat other organisms and make nutrients available.
  • Soil food web is important for plant growth:
    ~Builds soil structure.
    ~Stores nutrients and releases them in forms plants can use.
    ~Protects plants against diseases and pests.
    ~Can tie up salts and harmful chemicals.
    ~Provides resilience and adaptation to changing conditions.
  • Some bacteria and fungi form mutualistic associations with plant roots. Both plants and micro-organisms benefit.
    ~Plant roots exude proteins, sugars and carbohydrates ("cakes and cookies") which attract beneficial micro-organisms.
    ~Nitrogen-fixing bacteria inhabit the roots of leguminous plants.
    ~About 80% of world's plants have symbiotic relationships with fungi (mycorrhizae).
  • Ratio of bacteria to fungi is different for different plant communities.
    ~Bacteria-dominated in early succession communities (bare earth, weeds, vegetables).
    ~Fungal-dominated in late succession communities (shrubs, trees, old growth).
    ~Equal balance of bacteria and fungi for most row crops and garden flowers.
    ~Bacteria/fungal ratio can be changed to favor different kinds of plants.
  • Soil food web is degraded in disturbed land.
    ~Enemies of the soil food web: compaction, tilling (turning), pollution, pesticides, synthetic fertilizers.
    ~Degraded food web invites pests, disease and nutrient problems.
    ~Chemical solutions aggravate the problem.
    ~Need to restore and enhance the soil biology.
  • Monitoring soil biology.
    ~Ingham advocates a "direct count" method, in which individual organisms in a sample are counted under a microscope.
    ~The result is a report on the numbers/biomass of different classes of organisms estimated to be in the sample.
    ~These numbers give indication about the health or problems with the soil. For example, a high number of ciliates (a group of protozoa) indicates anaerobic conditions.
    ~Many problems can be solved or alleviated by applying compost or compost tea, according to Dr. Ingham.
  • Compost
    ~Aerobic good, anaerobic bad. It should not stink (stink=anaerobic).
    ~Three methods discussed: thermal (hot), worm, and static (backyard).
    ~The balance between fungi and bacteria can be controlled by different feedstocks and methods.
    ~Monitoring compost quality is important - all composts are not created equal.
  • Compost tea is a convenient way to apply compost.
    ~Actively aerated compost tea (AACT) is what Ingham studies and recommends.
    ~Other compost teas and liquid amendments exist (some anaerobic).
    ~Process
    >Good compost.
    >Good (potable) water without chlorine or chloramine.
    >Good brewing machine, easy to clean. Ask manufacturer for data.
    >Appropriate temperatures
    >Appropriate food for desired organisms
    >Brewing times variable (about 24 hours)
    >Prompt application.


I invite you to read more about it at the link below. The article is extensive and full of excellent information.

http://www.energybulletin.net/23428.html

See VermiCulture Northwest for the Tea Brewer I recommend.

What's important to remember is that no one factor is going to be a cure-all for whatever your problems might be. And like fine wine and intimate relationships, all good things take time.

Dr. Ingham advises there are limitations to compost tea:

Compost tea is not the end all "silver bullet" for all the problems that have developed in your yard over the years. Other practices, such as organic fertilizing, soil amending, mulching, aeration, etc., are also important to build and sustain a healthy yard and garden. The reality of it is that the soil, environmental and prior chemical condition of your yard all effect the overall health.

Take the time to read the above article and take the next step in taking care of your world.

Happy Worming,

Christy
www.vermiculturenorthwest.com
www.motherearthsfarm.com

Friday, October 13, 2006

Autumn Works!

Once the cooler weather starts to arrive, working in the bin begins anew. We have spent the hot summer months trying to keep the worms fed and the bins oxygenated without causing the environment the worms call home to over-heat and stress the worms.

The work I did in the bins during September caused a heat spike of 15 degrees:


For this reason I waited to work my bins until the temperature had dropped and likewise I will wait for the temperature to drop again before I continue working the bins. This is all relative to the daily/nightly temperatures reached this time of year in my area.

Once the temp comes down I will remove more product and add fresh bedding. This process will be repeated as many times as possible before winter sets in so that my beds are as full of fresh composting material as possible. With the onset of the cold winter months I want the bins to be producing as much of their own heat as possible. This is as good a scenario for the worms as it is for my power bill. (Although the bins have never cost me much to run in the winter, perhaps because of this strategy.)

As the daily/nightly temperatures cool I begin adding a wider variety of bedding material to the bins. Here you see a layer of leaves beneath the shredded newspaper.

After a summer of limited fresh bedding the worms happily go to town on this fresh source of feed stock.

For now our nights are in the 30's and we have had some frosts. The temp today at 11:44 A.M. is reading 55 degrees with blue skies and sunshine. Prrrrrfect!

For now, happy worming.

Christy
www.vermiculturenorthwest.com
www.motherearthsfarm.com

Where good things come from for body and soil.

Tuesday, September 12, 2006

See What Your Workers Can Do!

The workers are of course the worms. It never ceases to amaze me what they can do in a very short period of time when the conditions are right. These worms eat and eat and eat constantly. They don't stop, except then they are mating. If you ever saw this you would know why. If I can ever get a picture of that one I will share it with you.

Anyway, let me show you what I mean.

Here they are, just beneath the surface of the bedding material. As long as the material has enough moisture content and it is dark enough, this is where they like to be. I have just brushed the top of the bed with my hand to expose these worms.


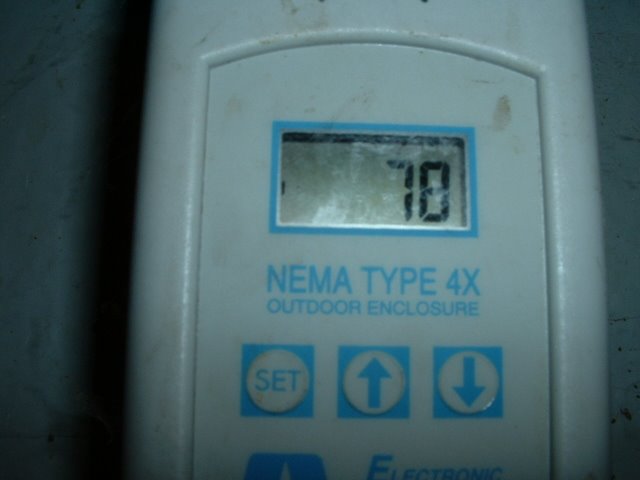
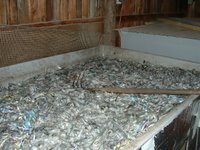
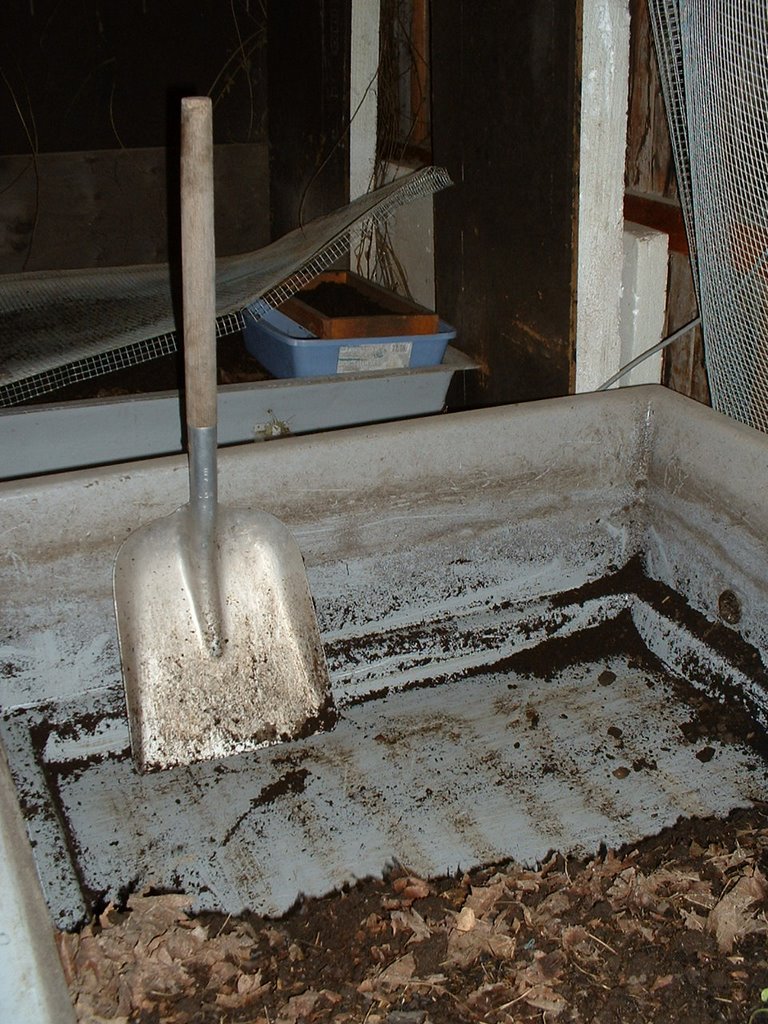
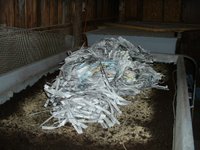
Here I have added shredded newspaper to the bin. I have been using manure all summer because it has been so hot and the manure was well composted. This meant that the bedding wouldn't add to the heat already building up in the bin. But now the bins are starting to cool down, back into the 70's and a nice layer of shredded newspaper is an appreciated change for the worms. They move into it overnight.

Within 6 days this is what the bins above look like.


So now I need to go out and feed my worms. Until next time happy worming!

Christy
www.vermiculturenorthwest.com

Sunday, August 20, 2006

Your Soil is Teaming with Life

If a healthy soil is full of death, it is also full of life: worms, fungi, microorganisms of all kinds ... Given only the health of the soil, nothing that dies is dead for very long.- Wendell Berry, The Unsettling of America, 1977
******************************

"Teaming With Microbes: A Gardener's Guide to the Soil Food Web"
Sometimes scientists can talk over the layman's head and not even realize that the message is not being conveyed. This book is written in a very understandable language, that even a simple worm farmer like myself could understand and relate to. A must read for anyone who wants to learn more about the life producing your food.

Smart gardeners understand that soil is alive and what is in the soil is what supports plant life. Healthy soil is exploding with life - beyond the worms and insects we can see with the naked eye - there are a multitude of bacteria, fungi, and other microbial forms of life vital to the soil food web that sustains healthy plant life. Resorting to chemicals destroys this delicate balance and results in an unhealthy situation for the soil, the plants, and the environment. You can't destroy this balance and not have an affect on the people, the children, family and friends. As gardeners, farmers, and inhabitants of the Earth we have an obligation to the next generation to leave behind a healthy soil. Venture beyond your current understanding that good soil grows healthy plants and understand why...

This book is newly available and can be purchased now from Amazon.com by clicking on the buy link.
If you are interested in worm bin composting and you garden you have the beginnings of understanding why. Learn all about the why and strengthen your resolve to garden organically.

Saturday, August 19, 2006

What I Do When It's Too Hot!

Well, since that last notification of a posting to my blog was bogus I figured I had better sit down and have a little chat with you all, and since it has been hot, hot, hot here all summer long I guess it would be good to share with you what I do with the worm bins when it is hot.

Hot and dry will kill the worms way before cold and wet will. And since by the very nature of composting you are creating heat you need to use a great deal of caution when the ambient temperature raises to the point it's uncomfortable for the average human. Granted some of us "like it hot", I'm not one of them and neither are the worms.

Once the bin temperatures get into the nineties you need to start frettin' about losing worms. I usually know I have lost worm mass when my "tea" buckets fill up almost over night. Worms contain a lot of moisture and when they die from over-heating that moisture is released and ends up in my tea buckets. Boo Hoo!

One of the best ways to keep your bins cool when the temperature raises is to set up a fan to blow over the surface of the bedding. You will need to be adding moisture as the fan will cause evaporation, which will cool the bin but will also leave the surface of the bedding dry. This is where the worms want to be, but not if it is too dry.

Another way to help keep the bins cool is to control the amount of composting going on in the bin. To do this you watch what you are adding for bedding material, don't mix it up. Whatever your main source of bedding material is, for instance I use manure, that's all you want to be adding. And you want to make sure the worms have worked it up real good before you turn it. This can leave your worms wanting for food so, I use worm chow.

It's made by Purina and is very finely milled for the worms to eat. I can sprinkle it on top of the worm bin and the worms come up and eat it at night. The food is immediately available and does not have to compost for the worms to eat it.

I use an old flour sifter to sprinkle the food on top of the worm bin. This gives me an even spread over the surface of the worm bin.

The worm chow comes in a 40 lb. bag and one bag fits perfect in a tote to keep the mice out.


Another thing I have noticed when it's hot, the worms seem to like it better with the screen off. The screen restricts airflow, even just a bit, and the worms notice. I haven't had a problem with leaving the screen off in the summer. Come fall I will be putting them back on to keep the mice out of the bins.

So, that's what I do when it's hot. Sometimes instead of using manure in the hot months I will stick with shredded newpaper. And that's all I use for bedding is layers of shredded newspaper on top of the bedding. Or maybe I'll just use leaves. The main thing is just not to mix it up. If you mix it up you're gonna compost and add heat to a system that is already stressed by the heat of the day.

Sunday, August 13, 2006

New Web Site In The Works!


www.vermiculturenorthwest.com

New website shows you exactly how I build my small 2 person worm bin, talks about the value of real brewed worm tea, worming with kindergarteners and how to proceed with a school project at the high school level. This site is devoted to worms, worm bin composting, and worm bin composting by-products. I will talk about castings, food stock, bedding material, and step by step how to.

Mother Earth's Farm will become an organic gardening site. There will be more information on organic fertilizers, composters, conventional composting, pests and pest control, gardening helpers.

For additional gardening tips you can check out Market Monthly News. This is a newsletter I write for the Kootenai County Farmers Market.

The Market is a place to find many treasures. Stop and see us if you are in the neighborhood. Stop by our website and get some ideas for starting your own Farmer's Market.

A lot goes into farming worms, gardening organically, and building a successful farmer's market where people come together to share unique creations, food grown safe and fresh, plants and flowers, music and friends.

The closer we get to Mother Earth the closer we get to each other. Come on Down!

Stop on by and see me, and feel free to drop me a line, Skype me, or send me a message.

Truly,
Christy

Wednesday, July 05, 2006

Worm Bin Composting | Maintaining the worm bin

Keeping the worms happy in the heat of summer
can be more of a challenge than that of winter!


As we move into the heat of summer, working the worm bin becomes a very delicate balance of keeping the bin aerated, moist, and fed. You want as little active composting going on as possible while still providing the worms with adequate nurishment. When the temperatures outside are in the nineties and climbing this can be a challenge.

I try to wait until the material in the bed has been worked very well by the worms. When I turn the bedding material, I will be incorporating air into the mix which will stimulate composting of any material that has yet to break down. In the picture below you can see the difference between the material that the worms have worked and that which they have not around the edges.
At the time of this working of the bins the temperatures here have been in the nineties. The bin I turned was reading a temperature of 81. The day after I turned it the temps went up to 97. That is actually too hot for the worms but by manipulating where the composting was taking place I am able to provide areas for the worms to go where they will be cooler. Since the bin is enclosed and the worms have no where else to go I absolutely need to do this or my worms will surely die.

The next picture shows the bin after the material has been turned. The worms have been disturbed and they really do not like this, but they are happy to have the air that is incorporated into the bedding material by this action.

The surface of the material will be rough and lumpy. I use a cultivator to break up the big clumps and smooth the area out.

Then a layer of food waste is spread down the center of the bin in a layer thick enough that you don't see the bedding material beneath it, but just. Don't put the food waste on too thick. Keep it to an area about 1/4 of the total surface area.


This is material my neighbor has saved for me and has been sitting in a bucket for about a week and smells pretty rank. I pour off any excess moisture before putting the material on the bed. If the material is covered properly with fresh bedding material then the smell will be covered as well and the worms will proceed to take care of it - smell and all.

The bedding material is horse manure that has been composting out in a designated area in my yard for over a year. The material is concentrated on top of the food waste down the center of the bin. As you can see it forms a mound of material on top of the food waste. The cable you see snaked across the top of the bin is the temperature probe. That is what tell me how hot the bin is. The probe is stuck down in the middle of the bin beneath the food waste. That is where it is reading 97 degrees.

The last thing I do is use my cultivator to smooth out the top of the fresh bedding to level it off some. I do not pull the material out to the edges of the bin. First off, the fresh material is dry and will take a few watering for the material to become saturated. The first couple of waterings the water just sloughs off. By leaving the area around the outside edges open the worms have friendly bedding material to come up into to feed and find cooler regions of the bin.

In no time at all (I was surprised that in this case the worms moved in to the fresh bedding overnight) the worms come back up to the surface to feed.

Saturday, May 27, 2006

Harvesting a Worm Bin

HARVESTING A WORM BIN FOR CASTINGS


Harvesting a worm bin for worms and harvesting for castings are two different things. If you are not growing worms as a commercial operator (as I'm assuming most if not all of you are not) then harvesting worms is as simple as taking material off the top of the worm bin which will be full of worms and sharing them.

However, if you are harvesting castings, which pretty much anyone growing worms will do at some point, then the process as I do it is revealed below.


Photo 1 shows the bin before I get started. Along the sides you can see the lines of where the product started in November when I move as much product from the bottom of my bins to one end to cure. The material continues to compost and dry. As the material finishes composting the volume decreases. Here is a shot of what the material looks like that I am harvesting from the worm bin.


On the right is the material I start with and on the left the finished product. Along with the leaves, manure, and shredded paper, I feed the worms food waste.


The first thing you do to harvest your bin is to get all the finished material out of the bin. Then you start moving the fresh bedding with most of the worms either out and into another holding bin, or in my case, I just work my way down the bin, piling the fresh material with the worms in it at the end of the bed.


This is the fresh bedding from the top filled with worms being piled down onto the top of the oposite end of the bed.


The picture above shows the layer of worms in the top layer of material. The finished material will be in the bottom 1/3 t0 1/4 of the bed. It depends how long the composting has been taking place since last harvest.

This picture shows the center of the composting area before it was disturbed, which is surrounded by uncomposted material such as the picture directly above this one.

This material is full of worms and will stay in the bin to populate the new bedding to be added.


The finished material at the bottom of the bin will be pulled down to the empty part of the bin, filling that end up.

The material with the worms in it will then be put into the now vacated portion of the bin, leveled out and new bedding material will then be placed on top. This new material will need to be smoothed out, watered, and watched to make sure the moisture level is brought up to where the worms like it. This may take a few days depending on how wet your bedding material was when it was initially added to the bin.

There, you are done. The finished material can then go into another holding area to continue drying if need be, screened if desired, and used for whatever purpose you have for it.

More pictures will be posted to further explain this process. Email me if you have questions or feel free to post a comment to benefit all.]

Happy Harvesting,

Christy
MotherEarth'sFarm.com
Where good things come from for body and soil.

Wednesday, May 03, 2006

Worm Bin Composting | After the Bin, What's Next

~~~Leaves~~~~~~~Manure~~~~~~~Paper~~~


Once you have made your decisions about your bin, including location then the next issue to address is the bedding material. These are some of the materials I use for my bedding material.

I am lucky enough to live in an area where I have a neighbor who has a horse. Any manure is good as long as it has composted. You don't want the bedding to heat up, it will kill the worms. An excellent choice is cow manure, pig manure, llama, and/or rabbit. Another name for redworms is manure worm. That's because manure is a natural habitat for them.
I also use leaves. Worms love rotting leave. Put them through the lawn mower or a shredder to shred the leaves up.

The last thing I use a lot of is shredded newspaper. I lay it on thick on top of the bin and wet it down. It takes a few wettings to get all the paper fibers saturated. Once the paper is evenly wet it lays on the bin like a blanket. You can pull it back and feed under it. Then when you want to see what the worms are doing you just pull back the blanket. Eventually the worms will work their way up into the newspaper and start consuming it. There will be a time you will pull the blanket back and it will fall apart. That's when you work it into the bedding and start over.

The variety of bedding helps keep a wide spectrum of bacteria in the end product. Add a variety of food stock and you have a bacteria powered product to add to your soil.

So get out there and start gathering bedding material.

If you can't find any of these there is a product called Coir. It is made from coconut shells. It is much like peat moss but it is a renewable resource unlike peatmoss.

Christy
wormn@motherearthsfarm.com
Where good things come from for the body and soil.